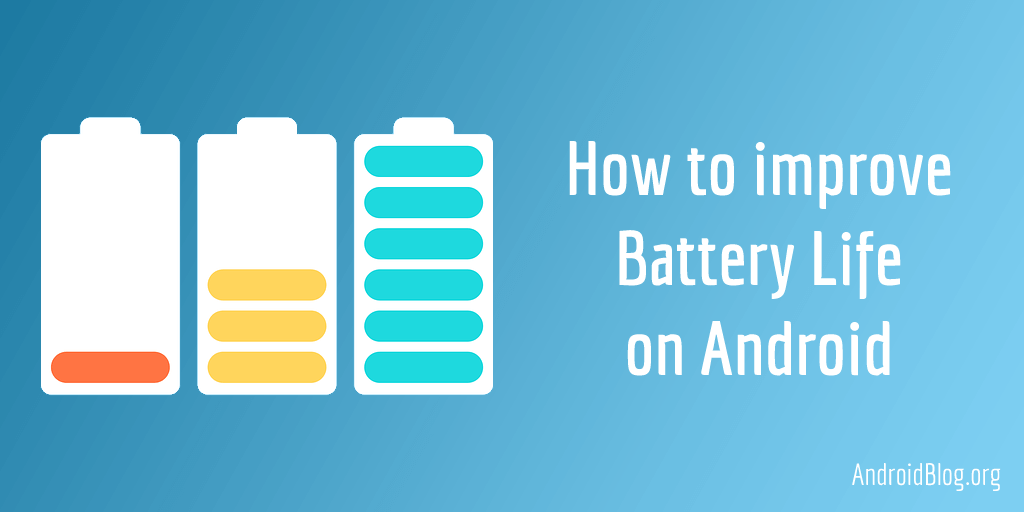
Probably one of the most asked questions among smartphone users is, “how to improve battery life on Android?”
How often do you look back to the days when you could charge up your phone’s battery once to almost last through the week? Yes, I do too.
But with the advent of smartphones, it’s pretty much history. Now, while most smartphones struggle to make it through the day on a single charge, a device that promises even two days of battery backup seems like a crazy deal.
Unfortunately, improvements in battery technology haven’t been able to keep pace with the advances in other aspects of mobile computers, if I may call our smartphones that. Poor battery life is probably one of the biggest grudges consumers have towards smartphones. All those gigabytes of storage and memory and those megapixels of the camera are of little use if there’s not much juice left in the battery to drive the hardware, right?
There are several factors responsible for the poor battery health on Android devices, such as the huge displays, powerful processors and the mobile games you love playing. That being said, there are some measures you can take to extend the battery life on your Android. Google prescribes a few best practices itself, which although very helpful, are not as comprehensive as they should be.
Let me try to fill the gap for you.
How to improve battery life on Android
Table of Contents
Manually adjust display brightness
Android comes with an option for auto-brightness or adaptive brightness that adjusts the brightness of the screen automatically based on the surrounding environment and activities. For example, when you’re in the sun, the brightness is automatically increased to a level where the various elements on your screen are clearly visible. Similarly, when it’s dark, the brightness is lowered.
Although it’s a handy feature, it takes a toll on the battery life of your Android device. This is due to two reasons:
The ambient light sensor keeps on checking the amount of light in the surroundings.
If the brightness is shot up unnecessarily, it eats more battery juice. Remember, the display on a mobile device uses up most of the battery power.
To turn off Adaptive brightness, follow the steps below.
- Go to Settings.
- Tap on Display.
- Next, tap on Adaptive brightness.
- Turn it off.
To push it further, avoid setting the brightness to very high levels; make it a habit to use your smartphone on low to mid brightness levels.
Adjust screen timeout
As mentioned before, the display on your Android smartphone has the biggest effect on battery backup. This automatically means that the longer the screen is turned on, the more power it consumes. So every time you quickly reply to a message and put your phone down without turning off the screen, the display remains turned on for quite some time unnecessarily consuming a lot of power.
So it becomes obvious that lowering the screen timeout will have a positive impact on the battery performance.
- Go to Settings.
- Tap on Display.
- Next, tap on Screen timeout.
- Choose 15 seconds (or 30 seconds, don’t go above that).
Use Dark mode on AMOLED displays
This only applies to devices that have an AMOLED display. It differs from LCD in the sense that in an AMOLED display, the pixels are illuminated individually while in an LCD all the pixels on the display are always illuminated by the backlight. This means that in an AMOLED display, the pixels are turned off where the screen is supposed to be dark or black, saving a lot of battery power.
To take advantage of this technology, enable Dark Mode on your device. To do this, follow the steps below:
- Go to Settings.
- Tap on Display.
- Turn on the Dark theme.
Additionally, you can choose Dark Mode on individual apps and select dark to black wallpaper to further improve the battery life on your Android smartphone.
However, on an LCD screen, it would make more sense to use the Light mode and a white-based wallpaper. Doing so will rid the display of the extra work of creating the pixels.
Avoid Live wallpapers
Live wallpapers are cool, I know. However, they don’t just suck the juice out of the battery but also cripple the device if it’s an underpowered one. Avoid them and go for static wallpapers.
If you want, go one step further and limit yourself to wallpapers with fewer colours on them. Fewer colours mean less stress on the screen to render them, effectively improving battery performance to an extent.
If your device has an AMOLED or OLED display, go for a dark wallpaper.
Disable widgets
App widgets are handy little tools for those who like them (I don’t, I find them ugly on the screen). They allow you to perform quick tasks right from the home screen without opening any app. However, they make frequent data requests to update their content each time they are visible on the screen. Disabling them can help to avoid that little power drain caused by them.
Turn off Bluetooth, Location and NFC
Features such as Bluetooth and NFC consume battery power when they are being used. But, do you know that they run services in the background even when they are not being used, rather just turned on?
Disabling these features when not in use can improve battery life on Android to an extent.
To do this, follow the steps below:
- Swipe down from the status bar.
- Disable Bluetooth, Location and NFC.
Use Wi-Fi instead of mobile data
Mobile data can stress out the battery on your device. Always prefer connecting to a Wi-Fi network instead of turning on the mobile data at home. Outside, make it a practice to turn it off whenever you don’t need an internet network or connect to a public Wi-Fi if available. This will surely help you improve the battery life on your Android device.
Turn off Wi-Fi when not needed
Although Wi-Fi drains less battery power than mobile data, it’s still not zero. If you don’t need internet connectivity, like when you’re sleeping, consider turning it off to save that little extra batter juice. You will notice a decrease in overnight battery level drops.
Turn off Automatic Wi-Fi
Android has a built-in feature called “Turn on Wi-Fi automatically”. It scans for high-quality Wi-Fi networks near you and turns on the Wi-Fi even if it was disabled before.
To do this, Android runs a service in the background that consumes a lot of battery power. Turning this feature off will increase your battery performance.
This can be done by following the steps below:
- Go to Settings.
- Tap on the Network & Internet option.
- On the next screen, tap on Wi-Fi.
- Here you will see a list of the saved Wi-Fi networks. Tap on Wi-Fi Preferences below.
- Next, disable the Turn on Wi-Fi Automatically toggle.
Turn off auto-syncing of accounts
If you have multiple Google accounts set up on your device, it’s a good idea to disable auto-sync for the one’s that don’t need it. This is because the auto-sync feature runs services in the background all the time, pulling out a chunk of the battery juice.
To turn off sync, follow the steps below:
- Go to Settings.
- Tap on Accounts.
- Select the account for which you don’t need auto-sync.
- On the next screen, tap on Account sync.
- Turn the toggle off for all the apps for which you want to disable sync, such as Calendar, Contacts, etc.
If you want to improve the battery life on your Android device, this tip will help a lot. Note that you can always sync your accounts manually when you need to.
Turn off vibrations
The vibration when you receive a call or a notification, or even the haptic feedback you receive on touching your smartphone screen at certain points are there to enhance the user experience.
There is a small motor inside your smartphone called Eccentric Rotating Mass (ERM) vibration motor with an off-centre mass. The rotation of this unbalanced motor produces a vibration. But just like any motor, the ERM consumes a substantial amount of energy (read battery power). I would advise disabling all kinds of vibrations on your device to save battery life.
To disable vibration for calls, follow the steps below:
- Go to Settings.
- Tap on Sound.
- Next, tap on Vibration for calls.
- Select Never vibrate.
To disable haptic feedback on keyboard keypresses, follow these steps:
- Go to Settings.
- Tap on Languages and input.
- Next, tap on On-screen keyboard.
- Select Gboard (or the keyboard app installed).
- Tap on Preferences.
- Disable the option for Haptic feedback on keypress.
These settings may be a little different for your device.
Turn off Hey Google detection
Do you know your phone’s Google Assistant is listening to you even when your phone is in sleep mode? This is because the Hey Google detection (earlier known as Ok Google) in your Google Assistant app is turned on by default. While this is fine if you’re an avid user of the hands-free features of Google Assistant, it is very taxing on battery life.
The app runs services in the background that listen to every bit of sound hitting your phone’s microphone and decipher it to confirm whether it’s a command. This is a complex process and a major culprit behind your phone’s dwindling battery life.
That is why I would always recommend turning it off by following the steps below.
- Open the Google app.
- Tap on More (bottom right corner).
- Tap on Settings.
- Next, tap on Google Assistant.
- Tap on Voice Match.
- Turn off Hey Google.
Enable Power Saver mode
Most Android devices these days come with an in-built Battery Saver or Power Saver mode, which automatically gets turned on when the battery percentage falls below a predefined threshold. It works by restricting or completely disabling background data and app usage.
Some manufacturers such as Xiaomi also offer another level of battery saver option which completely overhauls the user interface and restricts most of the functionalities of the device. However, I find that option overkill and useful only in very extreme scenarios.
Going back to the normal Battery Saver option, you can turn it on when your smartphone is not in use for some time.
To do this, follow the steps below:
- Go to Settings.
- Tap on Battery.
- Next, tap on Battery Saver.
- To turn on the feature, tap on Turn on now.
While I would not recommend turning on Power Saver mode every now and then, the feature can prove really handy if you’re outdoors and want to save some battery power.
Turn off animations
This one is for advanced users; the process is simple, although casual users might not want to go that deep. The smooth animations on your smartphone need a considerable amount of work by the processor that can hit battery levels hard.
Restricting animations on your smartphone can help extend the battery life of Android devices.
To do this, follow the steps below:
- First, enable Developer options on your device.
- Next, go to Developer options.
- Scroll down and look for Window animation scale, Transition animation scale and Animator duration scale.
- By default, their values will be set at 1.0x. Change them all to 0.5x. For even better results, you can make them 0.0x, though it might be a bit too much.
Restrict apps running in the background
Most of the apps that we use daily run services in the background for specific tasks. For example, the WhatsApp app needs to run services to check for incoming messages and media and display notifications. These services collectively consume a considerable amount of battery power.
You can save on some battery usage by restricting apps that you don’t use often.
To do this, follow the steps below:
- Go to Settings.
- Tap on Apps and Notifications.
- Expand the list of apps by tapping on See all XX apps.
- Tap on the app that you want to restrict.
- Tap on Advanced and then Battery.
- Tap on Background restriction.
- Select Restrict.
Root your Android
By rooting your Android device, you open the doors to a lot of tried and tested tweaks to drastically improve battery life on Android. Let’s look at some of them.
- Be-bloat your device by uninstalling all unwanted system apps that drain the battery power.
- Underclock the CPU to put less strain on the battery.
- Tweak display settings that are usually not available on non-rooted devices.
Install a custom kernel
If you’re an advanced user, you can consider installing a custom kernel to improve battery life on your Android device.
Kernel by definition is the core of an operating system that facilitates the interaction between the hardware and software components of a device. A poorly optimised kernel can potentially mess up the battery usage of your smartphone.
Thankfully, there are custom kernels available that are designed to be battery-friendly. XDA developers forums are a good place to look for some of them for your device.
Install custom ROM
Just like kernels, you can install a custom ROM on your Android device to extend the battery life. Although not all custom ROMs are known to have great effects on battery performance, what you need is a lightweight custom ROM that has unnecessary apps and services removed by default. One such example is ArrowOS. For more information, check out our list of the best custom ROMs.
Use Greenify app
If you have a rooted Android device, you can install the Greenify app to further optimise battery performance. With this app, you can hibernate selected apps on your device. Doing so will restrict apps from running in the background, thereby further increasing the battery life.
- Install the app.
- Give it superuser access.
- Allow Greenify service permission to run.
That’s it. Greenify will automatically hibernate misbehaving apps and restrict them from running in the background. You can further select more apps to be hibernated manually.
Greenify also works for non-rooted devices, although it is not as effective on them.
Note that hibernating apps using Greenify will restrict their normal operation and you will not receive any notifications from them.
Similarly, you can use an app called Servicely. It does the same thing, albeit differently. Rather than hibernating apps, it restricts them from running in the background, thereby helping with battery performance.
Monitor misbehaving apps
Most Android users probably don’t know this, but most of the apps keep running in the background even after you have closed them. So, it becomes important to monitor which background apps are draining most of your precious battery power.
To do this, follow these steps:
- Go to Settings.
- Tap on Battery.
- Next, tap on the menu (three dots in the top-right corner of the screen).
- Select Battery usage.
You’ll see a list of the top apps that consume most of the battery juice. Just uninstall whichever you think you don’t need. Keeping a check on apps that are draining more battery power than expected can save battery life in the long run.
Uninstall unnecessary apps
Most of us have this habit of installing random apps to try new features but losing interest in them soon. But do we always make sure we remove the app from our devices thereafter? Not really. The result is a bunch of apps that sit on our devices unnecessarily eating up storage space.
But more importantly, many of these apps have background services running often without our knowledge. So, you must get rid of such apps if you decide they are not for you.
Switch to Lite apps
Many companies are releasing a trimmed-down alternative to their flagship apps, usually called Lite apps. They are aimed at offering a better performance on underpowered devices and slower networks. These apps take up little storage space, run fewer background services and consume considerably less data. Making the switch from standard apps to their little brothers can help in extending the battery backup on your Android device while giving it a performance boost.
Keep apps up to date
Whenever you receive a new app update on your device, don’t ignore it. Most app updates come with bug fixes and other enhancements and optimizations, some of which may be directly aimed at improving the power optimization of the app. And even if you don’t notice any improvement, you can always be sure that the update either fixed/improved something or got you a new feature.
Install ad-free apps
In case you didn’t know this already, all those advertisements you see on the apps on your phone waste a lot of battery power. While I understand ads are important to support the developers, just from a performance point of view, they are a hindrance. Not to mention the issues with privacy and bad user experience.
If you have two apps that do the same thing, one with and the other without ads, go for the latter. It will have a slight (although not very noticeable) positive effect in improving battery performance on your smartphone.
Limit notifications
Notifications are very important if you want to stay updated with all that is happening around you. But it comes at a cost. All these social media, news and special offers notifications require background services that push them. As explained before, these background services use up a lot of power. To keep it within certain limits, disable notifications that you can live without.
To do this, follow the steps below:
- Go to Settings.
- Tap on Apps and notifications.
- Select the app that you don’t want notifications from.
- On the App info screen, tap on Notifications.
- Disable the toggle for All <app name> notifications.
Avoid battery optimizer apps
All those funky apps that claim to kill background apps on your smartphone are junk. Trust me when I say this, they do more damage to your device than good. The apps that they kill spring back to life in no time. And when they do, it ends up draining more power than they otherwise would. Overall, these apps do practically nothing to improve the battery life of Android devices.
Android by design does a good job at handling memory, so don’t let some pathetic piece of third-party code, that often are nothing but adware, go on a killing spree on your device.
Avoid graphics-heavy games
High-end games consume a lot of battery power. This is mainly due to three reasons. One, rendering the graphics requires a lot of work to be done by the processor which translates to higher battery usage. Second, most games need to be played on near-full brightness to enhance the visuals. Lastly, serious gaming requires high-end headphones that draw power from the phone’s battery.
If you’re already facing battery performance issues on your device, I would advise avoiding playing such games.
Practice full charging
It is recommended by experts to always allow the smartphone battery to charge fully in one go. Batteries are designed for an approximate maximum number of charging cycles, each of which is said to cause minor wear. Although it is not noticeable in general use, abrupt charging of the smartphone battery can damage it in the long run. So, by charging the device completely in one go, for example from 10% to 100%, you can minimise that risk.
Avoid third-party chargers
Always charge your device with the official charger that came with it. Third-party charges may not match the power specifications on your smartphone, causing issues such as slow charging or overheating.
Avoid high temperatures
Batteries, and for that matter most electronic and electrical components are known to get damaged at temperatures higher than the designed threshold. Try to avoid exposing your smartphone to higher temperatures to save not just the battery but the device itself.
So these were the best ways to improve battery life on Android. For most users, optimising the display settings, disabling unnecessary features and restricting apps and services from over-consuming memory and data will go a long way. For advanced users, root your device and get a custom ROM and kernel. You’ll be blown away by realising all that you can do to improve the battery life of your smartphone.
If you can follow at least a few of these tried and tested tips, I can assure you of a visible improvement in your smartphone’s battery performance.
Let me know if you know of any other hacks or tips that can extend the battery life of Android devices, I’ll be eager to try them out.
Cheers!

